Managing Volumes
As noted at the beginning of the section, volumes provide persistent storage that you can attach to your openstack instances.
info
The default recommendation is to check the "Delete when deleting instance" box when creating an openstack instance to prevent instance volumes from behaving ephemerally to avoid storage quota problems
Managing Volumes via GUI
Creating a Volume
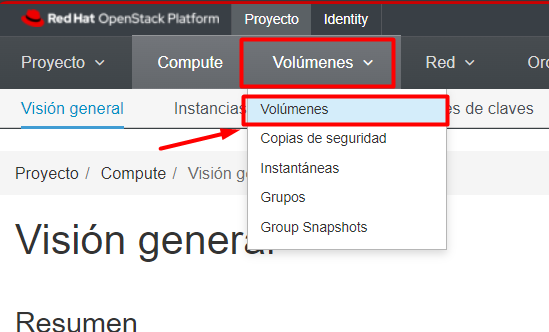
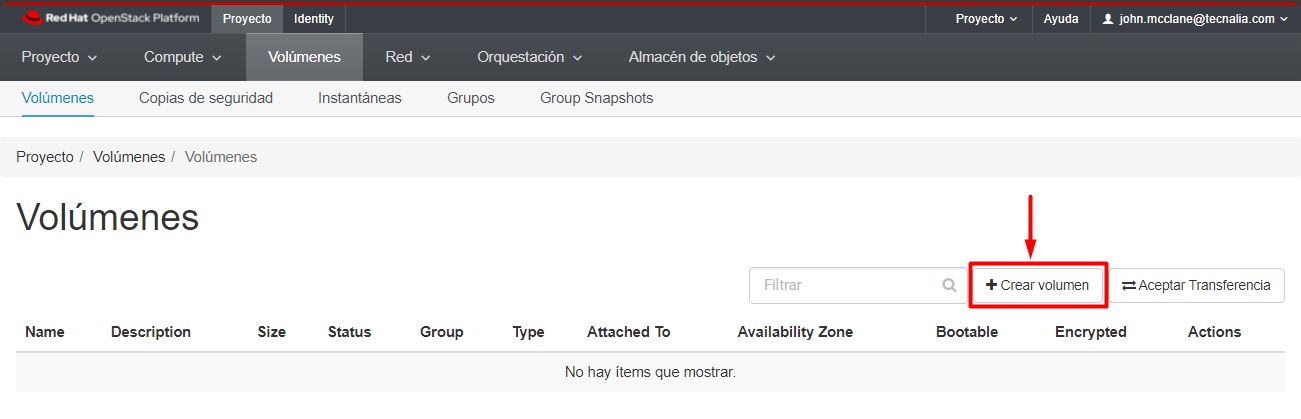
- Log in to the dashboard and select Volume tab to open the drop down. Then click on Volumes
- Click Create Volume Type button.
- In the Create Volume Type window, enter a name and description for the volume type.
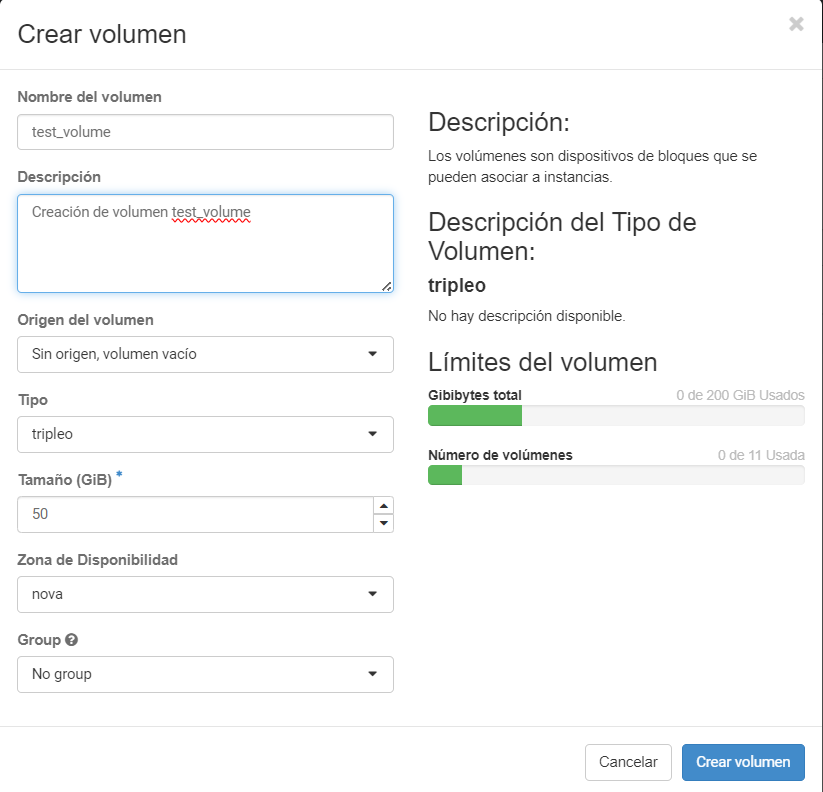
- Click Create Volume Type button to confirm your changes.
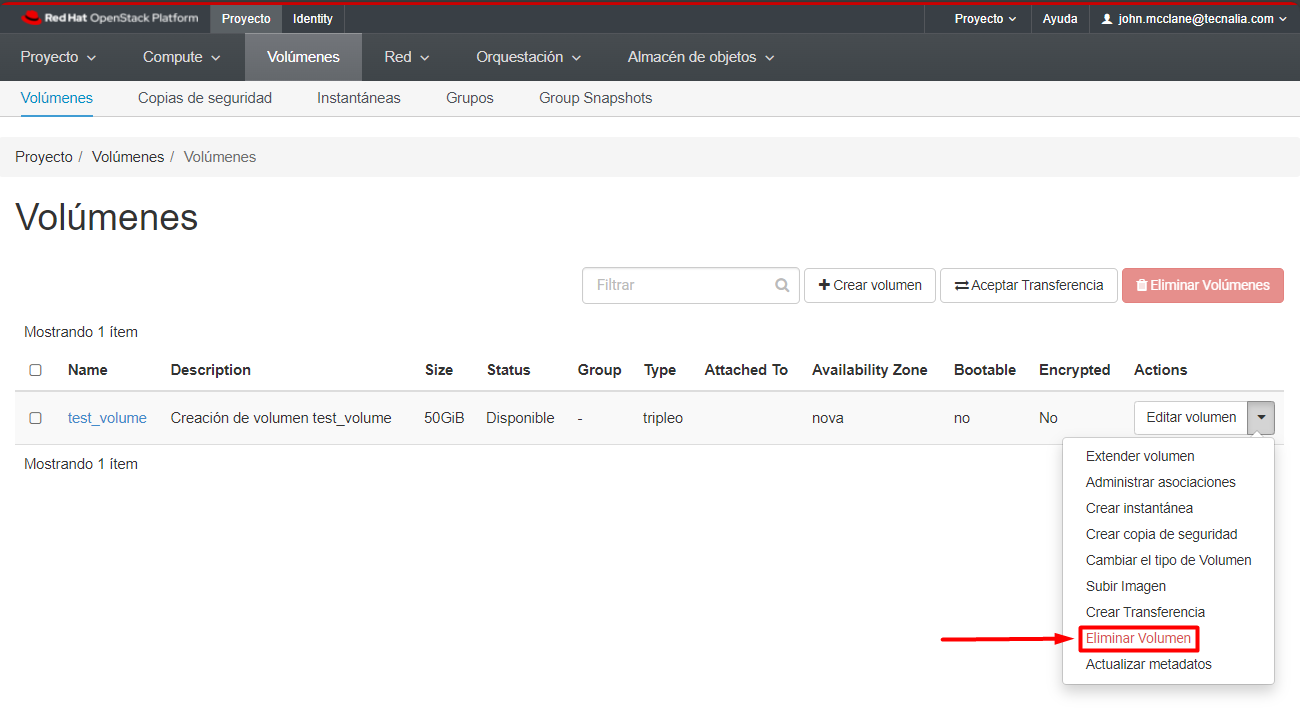
Delete a Volume
Delete volume types
- Log in to the dashboard and select Volume tab to open the drop down. Then click on Volumes
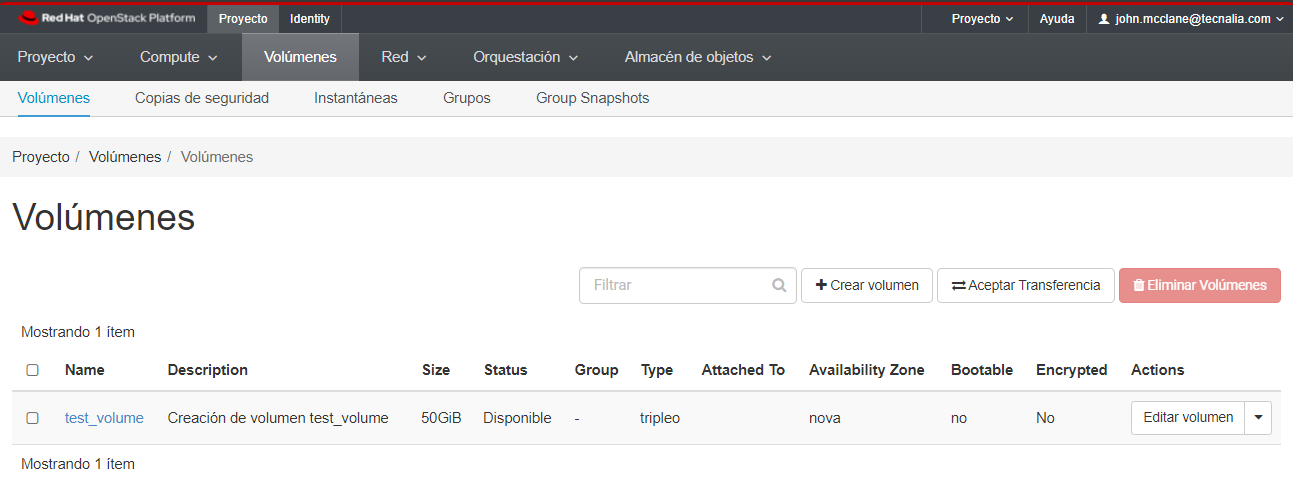
- Select the volume that you want to delete. Click on the arrow next to "Edit volume" then click Delete Volume button.
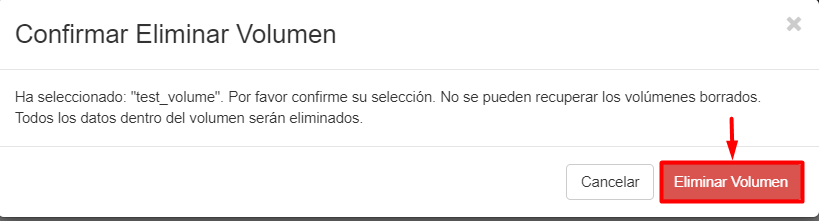
- In the Confirm Delete Volume Types window, click the Delete Volume Types button to confirm the action.
Managin Volumes via CLI
Create a Volume
To create a new volume, use the following command:
$ openstack volume create --size <size_in_GiB> <volume_name>
Example:
$ openstack volume create --size 50 test_volume

Delete a Volume
To delete a existent volume, use the following command:
$ openstack volume delete <volume_id_or_name>
$ openstack volume delete test_volume
info
The OpenStack delete volume command does not return any results confirming the deletion.
